Tokyo Photography: 25 Best Spots, Expert Tips & Camera Gear for Stunning Photos
Have you ever imagined photographing a quiet Tokyo alley at sunrise, colourful neon reflections after rain, or the extraordinary contrast between an ancient temple and a modern skyscraper? Tokyo offers all these scenes—and many more—often within a single day. Tokyo photography is about capturing the contrast between traditional Japanese culture, futuristic architecture, everyday street life, and the city’s changing seasons. With the right locations, timing, composition, and equipment, photographers of every skill level can create memorable images without needing an expensive camera or professional experience Tokyo IC Card
Understanding Tokyo Photography
Tokyo is not one visual environment but a collection of contrasting worlds. A photographer can move from the wooden details of a traditional shrine to glass office towers, from a quiet residential lane to a crowded entertainment district, and from a riverside landscape to a futuristic digital-art installation.
That variety makes Tokyo particularly rewarding for photographers who enjoy changing styles throughout the day.
What Makes Tokyo Such a Good Photography Destination?
Several features make the city stand out:
- Traditional and modern architecture: Historic temples and shrines sit alongside contemporary buildings.
- Distinctive urban atmosphere: Vending machines, narrow lanes, overhead cables, railway crossings, shopfronts, and illuminated signs create detailed street scenes.
- Excellent public transport: Many photography districts are connected by rail, making it possible to explore several areas in one day.
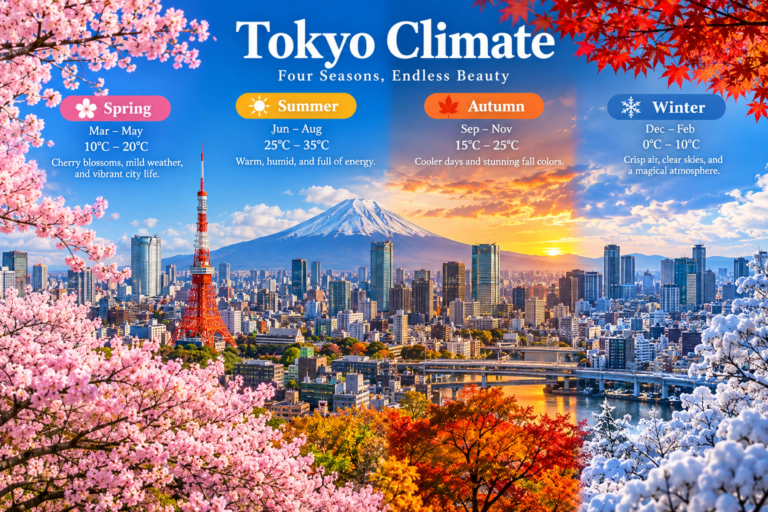
- Seasonal variety: Cherry blossoms, summer greenery, autumn foliage, and winter illumination provide different visual opportunities.
- Day-to-night transitions: The city changes dramatically as sunlight fades and signs, windows, and vehicle lights become more prominent.
- Photogenic everyday life: Commuters, cafés, markets, bicycles, small restaurants, and neighbourhood streets reveal a more personal side of Tokyo.
The most interesting photographs often come from observing these details rather than trying to reproduce the same famous image everyone else takes.
The Main Types of Tokyo Photography
Street photography: Capture the rhythm of urban life, pedestrian movement, shopfronts, railway crossings, and changing light. Shibuya, Shinjuku, and smaller residential streets offer very different approaches.
Architecture and cityscapes: Photograph skyscrapers, elevated walkways, bridges, rooftop views, and the relationship between old and new buildings.
Cultural and architectural photography: Focus on temple gates, shrine approaches, roof details, gardens, stone lanterns, and the atmosphere of traditional districts.
Night photography: Use illuminated signs, reflections, traffic trails, and blue-hour skies to capture the city’s energy after dark.
Seasonal and nature photography: Photograph cherry blossoms, autumn leaves, Japanese gardens, seasonal flowers, and reflections along waterways.
Best Photography Spots in Tokyo
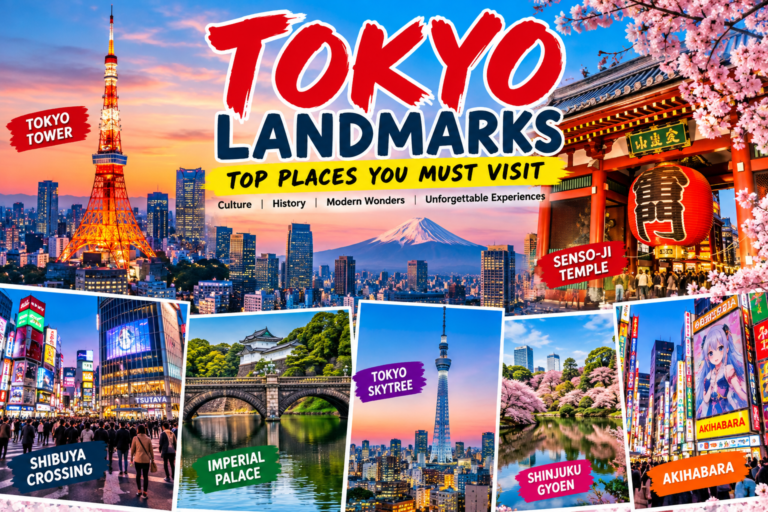
The best location depends on the photograph you want to create. Some places are ideal for wide city views, others for intricate details or atmospheric street scenes. Use the following locations as a starting point rather than a checklist to rush through.
1. Shibuya Crossing: The Energy of Modern Tokyo
Shibuya Crossing is one of Tokyo’s most recognisable urban scenes. When pedestrian signals change, people cross from several directions, creating a constantly changing pattern against large digital displays and surrounding buildings.
For photographers, the challenge is turning a busy scene into a clear composition.
Best photography opportunities:
- Wide-angle images that show the crossing and surrounding buildings.
- Telephoto compositions that compress pedestrians, signs, and architecture.
- Long exposures that emphasise movement.
- Blue-hour photographs with illuminated signs and a deep blue sky.
- Reflections and silhouettes in nearby glass surfaces.
Practical camera settings: For a moving crowd, begin around 1/250 second or faster if you want to freeze people. For deliberate motion blur, experiment with roughly 1/4 to 1 second, adjusting the result for the speed of movement and available light. A tripod is not essential for every shot and may be impractical in crowded viewing areas.
Look for publicly accessible viewpoints, cafés, or observation areas where photography is permitted. Check the rules of the particular venue before setting up equipment.
A creative tip: Instead of photographing the entire crossing every time, focus on a single person or a small group framed by the larger crowd. This produces a more deliberate photograph and gives the viewer a clear subject.
2. Senso-ji Temple: Traditional Japanese Architecture
Senso-ji in Asakusa offers a different visual language from Tokyo’s commercial districts. Its prominent lanterns, traditional rooflines, incense burner, and temple grounds create opportunities for architectural detail, cultural photography, and layered compositions.
Arriving early is useful because the approach and surrounding streets can become busy later in the day. Morning light may also be softer and more directional.
Try photographing:
- The Kaminarimon gate from different distances.
- Roof details against the sky.
- Lanterns framed by surrounding architecture.
- Incense smoke when conditions and site rules permit.
- The contrast between the historic temple and modern buildings nearby.
Important: Photography restrictions may apply inside buildings and around worship areas. Follow posted signs and avoid photographing people engaged in prayer without permission.
A useful exercise is to create a sequence of three images: one wide view of the temple, one medium shot of an architectural feature, and one close-up of a texture or detail. Together, the images tell a more complete story than a single postcard-style photograph.
3. Shinjuku: Neon, Nightlife, and Urban Layers
Shinjuku is ideal for photographers drawn to dense city scenes. Illuminated signs, narrow lanes, busy pavements, entertainment districts, railway infrastructure, and tall buildings produce many opportunities for layered compositions.
Explore the area with a clear visual idea rather than trying to photograph everything. For example, spend one evening focusing exclusively on reflections, another on signs and typography, and another on silhouettes.
Recommended approaches:
- Use a wider lens to show the scale of narrow streets.
- Use a normal or short telephoto lens to isolate individual signs and people.
- Look for repeating shapes, overlapping signs, and strong lines.
- Expose carefully for bright signs so that highlights retain detail.
- Return after rain if it is safe to do so; wet surfaces can reflect artificial light beautifully.
Shinjuku is also a useful location for learning how to handle difficult mixed lighting. Neon, LED displays, streetlights, and shop interiors may all have different colour temperatures. Shooting RAW gives you more flexibility when adjusting white balance later.
Be particularly considerate in small entertainment alleys and in front of businesses. Do not block entrances or photograph people in sensitive situations.
4. Meiji Jingu: Forest Atmosphere and Quiet Compositions
Meiji Jingu offers a calm contrast to nearby Harajuku. The forested approach, large torii gates, gravel paths, and filtered light are well suited to environmental photography and images with a quieter mood.
On bright days, the tree canopy can help reduce harsh sunlight. On overcast days, the softer light can make foliage and wood textures easier to photograph.
Try these compositions:
- Place a torii gate off-centre to create a balanced image.
- Use the path as a leading line.
- Photograph repeating tree trunks for rhythm and depth.
- Use a wider aperture to separate a nearby detail from the forest.
- Capture a series showing the transition from the entrance to the deeper forest.
Meiji Jingu has specific restrictions around photography at the main sanctuary, including areas where people pray. Promotional photography and drone use are also restricted under its published etiquette guidance. Check current site rules before your visit.
5. Tokyo Metropolitan Government Building: Panoramic City Views
For a broad view of the metropolitan skyline, the Tokyo Metropolitan Government Building observatories in Shinjuku are a valuable option. The observatories are approximately 202 metres high and have offered free admission, although closures can occur at short notice.
This is a good location for photographers who want a sweeping cityscape without paying for every observation deck they visit.
How to improve your skyline photographs:
- Visit in clear weather if distant buildings are important to the composition.
- Consider late afternoon or sunset for changing colours in the sky.
- Photograph during blue hour when the city lights become visible.
- Keep the camera level to avoid distorted vertical lines.
- If photographing through glass, position the lens close to the window without touching it, and avoid bright clothing that may reflect in the glass.
- Check the observatory’s current photography and equipment restrictions before bringing a tripod.
If the skyline looks flat, use a foreground element or a building edge to create depth. A photograph does not need to include the entire city to communicate its scale.
6. Tokyo Station and Marunouchi: Elegant Architecture
Tokyo Station’s red-brick Marunouchi building offers a striking architectural subject surrounded by contemporary offices and busy streets. The area works well for architectural photography, symmetry, reflections, and urban scenes with a more formal style.
Look for:
- Symmetry in the station façade.
- Leading lines formed by pavements and streets.
- Reflections in nearby office buildings.
- Compositions that combine the historic station and modern towers.
- Blue-hour scenes with illuminated architecture.
A tripod may be restricted or inconvenient in some areas, so learn to stabilise your camera using a wall, railing, or your own stance where permitted. For vertical buildings, keep the camera level and move farther back when possible to reduce converging lines.
7. Shinjuku Gyoen: Gardens and Seasonal Colour
Shinjuku Gyoen is a useful choice for nature photography within the city. Its gardens, ponds, paths, and seasonal planting provide opportunities for wide landscapes, close-up details, and carefully composed portraits.
Spring blossom season attracts many visitors, so consider a weekday or an early visit when possible. Autumn offers another visual style, with warm foliage and reflections.
Photography ideas:
- Frame a pond with trees on both sides.
- Use a longer focal length to isolate blossom clusters.
- Photograph leaves against a darker background.
- Include a path or bridge to suggest a route through the landscape.
- Use a polarising filter where appropriate to manage reflections on water and foliage.
Check current opening times, admission conditions, and photography rules before travelling. Some activities and equipment may be restricted, particularly when a shoot involves models, commercial use, or obstructive equipment.
8. Harajuku and Omotesando: Fashion and Design
Harajuku is known for fashion, youth culture, and colourful street scenes, while Omotesando offers broad avenues, design-focused buildings, and stylish storefronts.
For street photography, look for visual relationships between clothing, architecture, colour, and movement. You can make compelling photographs without photographing faces directly: shoes, silhouettes, shadows, hands carrying shopping bags, and reflections can all suggest the character of a place.
If you want to photograph a specific person, ask for permission. For a fashion shoot, obtain the necessary consent and check whether the chosen location requires approval for commercial or organised photography.
9. Odaiba and the Waterfront: Open Space and Skyline Reflections
Odaiba offers a more open environment than central Tokyo’s narrow streets. The waterfront, Rainbow Bridge views, and modern buildings can create strong compositions, particularly around sunset and blue hour.
Try combining the bridge with the water, foreground railings, or nearby structures. On clear days, a wide lens can convey the open atmosphere; a longer lens can isolate the bridge and compress the skyline.
Wind can be stronger near the waterfront, so secure your camera strap and avoid placing equipment where it could fall or obstruct pedestrians.
10. Nakameguro: River Scenes and Seasonal Photography
Nakameguro is especially well known for its river and cherry-blossom scenery. During peak blossom season, the area can be crowded, making patience and careful positioning essential.
Rather than forcing a wide photograph into a dense crowd, look for smaller compositions:
- Branches forming a frame around the river.
- Blossoms reflected in the water.
- A bridge creating a strong horizontal line.
- Details of petals, bark, and seasonal decorations.
- A view that captures the neighbourhood beyond the blossoms.
Never climb barriers or step into unsafe areas to obtain a photograph. During busy seasonal events, local rules may be introduced to manage crowds, so follow current instructions.
11. Akihabara: Electronics, Signs, and Pop Culture
Akihabara offers bold colours, layered signage, electronics stores, and distinctive street scenes. It is a useful place to explore graphic composition and colour contrast.
Look for repeated rectangles, bright signs, reflections, and the visual density of buildings. A telephoto lens can isolate details that would otherwise be lost in the wider scene.
Do not assume that photography is allowed inside shops or private venues. Ask staff before photographing products, employees, or customers, and follow any restrictions on images of displays.
12. Ueno Park: Public Spaces, Museums, and Seasonal Scenes
Ueno Park offers broad paths, greenery, water, seasonal flowers, and cultural institutions. It can suit photographers who want a less intense pace than the busiest commercial districts.
Try a photo walk built around one theme: reflections, people interacting with public spaces, tree canopies, or the changing light along the park’s paths.
For museums, check each institution’s photography rules separately. Some exhibitions prohibit photography even when photographs are allowed in public areas.
13. Ginza: Luxury Storefronts and Geometric Design
Ginza is useful for architectural details, sophisticated storefronts, window reflections, and carefully designed urban scenes. The visual style can be cleaner and more structured than the dense neon atmosphere of Shinjuku.
Look for symmetry, glass façades, repeating lines, and the contrast between pedestrians and large buildings. Keep a respectful distance from shop entrances, and remember that a public pavement may be next to private property with its own photography restrictions.
14. Kiyosumi Gardens and Quieter Green Spaces
For a quieter garden experience, explore traditional landscape gardens such as Kiyosumi Gardens. Rocks, stepping stones, ponds, and carefully arranged plants provide compositions that reward patience.
Instead of photographing the entire garden in every frame, look for small relationships between elements: a stone reflected in water, a branch crossing the sky, or a path that leads the eye towards a distant feature.
15. Railway Crossings and Residential Streets
Tokyo’s smaller residential neighbourhoods can be as rewarding as its famous landmarks. Railway crossings, overhead cables, vending machines, bicycles, narrow streets, and compact houses create everyday scenes that feel specific to the city.
These places require extra care because they are also people’s homes and daily routes.
- Keep entrances and pavements clear.
- Do not photograph through windows or into private spaces.
- Avoid blocking residents or commuters.
- Do not stand on tracks, roadways, or restricted railway property.
- Ask permission when a photograph centres on an identifiable person.
The goal is to document the character of a neighbourhood without turning its residents into unwilling props.
Best Time of Day for Tokyo Photography
The same location can look completely different depending on the time of day. Planning around light is often more valuable than carrying extra equipment.
Sunrise: Quiet Streets and Soft Light
Early morning is one of the best times to photograph Tokyo’s temples, gardens, residential streets, and popular landmarks before the busiest periods.
Sunrise can offer:
- Fewer people in some locations.
- Soft light across buildings and trees.
- Longer shadows that create depth.
- A quieter atmosphere for architectural details.
- A chance to photograph the city beginning its daily routine.
However, not every attraction opens at sunrise. Some parks, museums, gardens, and observation areas have fixed opening times, so check access before planning an early visit.
Best subjects: Temples, shrines, neighbourhood streets, gardens, bridges, and exterior architecture.
Morning: Everyday Life and Street Scenes
As the city becomes active, morning light can illuminate streets while commuters, cyclists, shopkeepers, and delivery workers bring movement to the scene.
For street photography, use a shutter speed fast enough to capture the motion you want. Start around 1/250 second for walking subjects, then adjust according to their speed and the available light.
Look for backlighting, reflections, and small interactions. A person walking beneath a building’s shadow may create a stronger composition than a wide photograph of the entire street.
Midday: Architecture, Interiors, and Detail Photography
Direct midday sunlight can produce harsh shadows and high contrast. This does not make midday photography useless; it simply changes which subjects work best.
Use the period to photograph:
- Architectural geometry and strong shadows.
- Covered shopping streets.
- Museum or exhibition interiors where photography is permitted.
- Details beneath roof eaves.
- Products, food, and objects in controlled light.
- Textures and patterns that benefit from direct sunlight.
If the sky is very bright, avoid exposing every photograph for the darkest part of the scene. Preserve important highlights and adjust shadows later where possible.
Golden Hour: Warm Light and Portraits Tokyo photography
Golden hour is the period around sunrise or sunset when sunlight is relatively low and warm. Its exact timing changes with the season, weather, and location.
This light is useful for portraits, buildings, bridges, riverside views, and scenes where warm tones contribute to the atmosphere.
For portraits, try placing the sun behind the subject and using exposure compensation or face detection to keep the face properly exposed. Be careful not to let bright skies dominate the frame unless that is part of your intended composition.
Blue Hour: Tokyo’s Architectural Sweet Spot Tokyo photography
Blue hour occurs around twilight, when the sky retains a deep blue colour while artificial lighting becomes prominent. It can be an excellent time to photograph Tokyo’s buildings, bridges, and illuminated streets.
The biggest advantage is the balance between the sky and the city lights. Wait until the sky has darkened enough for the signs and windows to stand out, but not so much that the sky becomes nearly black.
For cityscapes, begin with ISO 100–800, an aperture around f/5.6–f/8, and a shutter speed appropriate to your support and subject. These are starting points, not fixed rules. Handheld shooting may require a wider aperture, higher ISO, or image stabilisation.
Night: Neon, Reflections, and Moving Traffic Tokyo photography
Night photography is one of Tokyo’s most recognisable visual styles. Illuminated signs, vehicle lights, glowing windows, and wet streets can create dramatic images.
Useful techniques include:
- Expose for bright signs to avoid losing all detail in highlights.
- Use a wide aperture for handheld street scenes.
- Increase ISO when a faster shutter speed is essential.
- Try long exposures for traffic trails when you can stabilise the camera safely.
- Photograph reflections in glass, polished surfaces, and wet pavements.
- Use RAW files if you plan to adjust mixed lighting and contrast.
Avoid assuming that every street is safe for a tripod. In busy areas, a compact handheld setup is usually more practical.
Tokyo Photography by Season
Tokyo’s seasons influence colour, light, weather, crowds, and the subjects available to photograph. No season is universally best; the right choice depends on your style.
Spring: Cherry Blossoms
Spring blossom is one of Tokyo’s most sought-after photographic subjects. Try photographing individual blossoms, wider river scenes, petals on water, and branches against the sky. Peak bloom varies each year, and popular areas can be very crowded.
Summer: Greenery and Dramatic Skies
Summer brings lush foliage, bright colours, and opportunities for stormy skies and reflections. Heat, humidity, and sudden rain can affect equipment and comfort. Carry water, a cloth for your lens, and protection for electronics.
Autumn: Foliage and Warm Colour Tokyo photography
Autumn is ideal for garden photography, leaf details, reflections, and architecture framed by red or golden foliage. Timing differs by location and year, so check recent seasonal conditions rather than relying on a fixed date.
Winter: Clear Views and Illuminations Tokyo photography
Winter can offer crisp city views and seasonal light displays. Shorter daylight hours make blue-hour planning easier, while cold weather can reduce battery performance. Carry spare batteries in an inner pocket.
Is Cherry Blossom Season Always the Best Time?
Not necessarily. Blossom season offers beautiful subjects, but it also brings heavy visitor numbers and unpredictable timing. If your priority is clean architectural compositions, quiet streets, or flexible sightseeing, another season may be more rewarding.
A useful alternative is to plan for a broader photographic theme rather than one event. Gardens, modern architecture, food, railways, and night scenes remain available throughout much of the year.
Choosing the Right Camera for Tokyo Photography
You do not need a professional camera to take excellent photographs in Tokyo. The best equipment is the equipment you can carry comfortably, operate confidently, and use in the conditions you encounter.
Smartphone Photography Tokyo photography
Modern smartphones are highly capable for travel photography. They are convenient, discreet, and quick to use, making them particularly useful for everyday street scenes, food, architecture, and social media.
Advantages:
- Light and easy to carry.
- Fast access to camera controls.
- Convenient image editing and sharing.
- Good computational processing for high-contrast scenes.
- Multiple built-in focal-length options on some models.
Limitations:
- Small sensors can struggle with very dark scenes.
- Digital zoom may reduce image detail.
- Artificial sharpening and night processing can create unnatural results.
- Manual control may be more limited than on a dedicated camera.
Best for: First-time visitors, casual photographers, lightweight travel, and people who value convenience.
Mirrorless Cameras Tokyo photography
Mirrorless cameras offer interchangeable lenses, larger sensors in many models, manual controls, and a compact body compared with many traditional DSLR systems.
They are especially useful if you want to photograph Tokyo at night, create shallow depth of field, capture action, or produce images for larger prints.
Look for:
- Reliable autofocus.
- Good high-ISO performance.
- In-body or lens-based stabilisation, where available.
- A lens selection suited to your style.
- Comfortable controls and menus.
- Good battery life and accessible storage options.
A mid-range mirrorless camera with one versatile zoom may be a better travel choice than a flagship body with several heavy lenses.
DSLR Cameras Tokyo photography
DSLR cameras remain capable photographic tools, especially for photographers who already own compatible lenses and know their system well.
Their potential disadvantages for travel include greater size and weight in some setups, though individual models vary considerably.
There is little reason to replace a functioning DSLR solely because mirrorless cameras are newer. If your current system produces the results you want, invest in practice, suitable lenses, and reliable backup storage before upgrading.
Action Cameras Tokyo photography
Action cameras are useful for walking videos, travel clips, cycling footage where permitted, and wide-angle scenes. They are not always the best choice for detailed still photography at night because of their small sensors and fixed wide-angle perspective.
Use them as a complementary tool rather than expecting one device to do every photographic job equally well.
Which Camera Setup Is Best for a First Tokyo Trip?
For many visitors, a smartphone or a lightweight mirrorless camera with a standard zoom is sufficient. A small prime lens can be added if you want better low-light capability or a different creative look.
The priority should be mobility and consistency. Tokyo involves walking, station transfers, crowds, stairs, and frequent changes of location. Heavy gear can make it harder to notice spontaneous moments.Best Lenses for Tokyo Photography
A lens affects the field of view, perspective, background separation, and amount of light reaching the camera. You do not need a large collection; two well-chosen focal lengths can cover many situations.
Wide-Angle Lenses: Approximately 14–24mm Tokyo photography
Wide-angle lenses are useful for:
- Tall buildings and architectural interiors.
- Narrow streets where you cannot move farther back.
- Large temple gates.
- Broad landscapes and waterfront scenes.
- Environmental portraits that show a person’s surroundings.
The challenge is distortion and exaggerated perspective. Objects close to the camera can appear much larger than objects farther away. Keep important subjects away from the extreme edges when distortion would be distracting.
Standard Lenses: Approximately 24–70mm Tokyo photography
A standard zoom is one of the most versatile choices for travel photography.
It can cover environmental portraits, street scenes, architectural details, food, and general sightseeing without requiring constant lens changes.
If you are carrying only one lens, a standard zoom is often a practical starting point.
Prime Lenses: 24mm, 35mm, and 50mm Tokyo photography
Prime lenses have a fixed focal length. Many offer wide maximum apertures and can be useful in low light.
- 24mm: Useful for environmental street scenes and architecture.
- 35mm: A flexible field of view for documentary and street photography.
- 50mm: Useful for portraits, details, and tighter compositions.
The best choice depends on your sensor size, personal style, and the distance at which you prefer to photograph.
Telephoto Lenses: Approximately 70–200mm Tokyo photography
Telephoto lenses help isolate distant architectural details, compress layers of buildings, and photograph subjects from farther away.
They can also encourage more deliberate compositions by reducing distractions around the edges of the frame.
Use them respectfully when photographing people. A long lens does not remove the need for consent or consideration of privacy.
Should You Bring a Tripod?
A tripod can help with long exposures, low-light architecture, and carefully composed landscapes. However, it adds weight and may be prohibited or impractical in crowded public areas, observation decks, museums, gardens, and other venues.
Before packing one, decide which images genuinely require it. A small travel tripod may be useful for permitted locations, but many Tokyo photographs can be made handheld.
Essential Camera Settings for Tokyo Photography
Camera settings should support your creative intention. There is no single setting that works for every Tokyo scene, but the following starting points can help you respond quickly.
| Photography situation Tokyo photography | Shutter speed Tokyo photography | Aperture Tokyo photography | ISO Tokyo photography |
|---|---|---|---|
| Walking pedestrians | 1/250–1/500 sec | f/2–f/5.6 | Auto or as needed |
| Station or street scenes | 1/125–1/500 sec | f/2–f/4 | Auto or as needed |
| Architecture in daylight | 1/125 sec or faster handheld | f/5.6–f/11 | Low when possible |
| Night street photography | 1/125–1/250 sec as a starting point | f/1.4–f/2.8 | Higher if needed |
| Cityscape with stable support | Variable, often several seconds | f/5.6–f/8 | Low |
| Moving trains | 1/500 sec or faster | f/2.8–f/5.6 | Auto or as needed |
| Cherry blossom details | 1/250 sec or faster for wind | f/2.8–f/8 | Low to moderate |
These ranges are guides, not guarantees. Available light, lens stabilisation, subject movement, focal length, and sensor performance all influence the result.
Aperture: Control Depth of Field Tokyo photography
Aperture controls how much light enters the camera and how much of the scene appears in focus.
A wide aperture, such as f/1.8 or f/2.8, can separate a subject from a blurred background. This is useful for portraits, food, and details in visually busy streets.
A narrower aperture, such as f/8, can help keep more of a cityscape or architectural scene in focus. However, the entire scene may not be sharp at every distance, and extremely narrow apertures can reduce detail because of diffraction.
Shutter Speed: Freeze or Emphasise Movement Tokyo photography
Shutter speed determines how long the sensor records light.
Use a faster shutter speed to freeze a passing cyclist or moving train. Use a slower speed to create deliberate motion blur, traffic trails, or a sense of movement through a crowded crossing.
For handheld photography, a useful rule is to begin with a shutter speed around the reciprocal of the lens’s full-frame-equivalent focal length, then adjust for your technique, stabilisation, and subject movement. Fast-moving subjects may require much faster speeds.
ISO: Balance Image Quality and Exposure Tokyo photography
ISO controls the camera’s amplification of the recorded signal. Raising ISO can help you maintain a fast shutter speed in low light, but it may also increase visible noise and reduce detail.
Do not treat high ISO as a failure. A slightly noisy photograph with a sharp, meaningful moment is often more useful than a clean but blurry one.
White Balance: Handle Tokyo’s Mixed Lighting Tokyo photography
Tokyo scenes may contain cool daylight, warm streetlights, fluorescent interiors, and colourful LED signs at the same time.
Auto white balance is convenient, but it can change between images. For a consistent photo series, consider using a fixed white-balance setting or adjusting RAW files later.
Do not neutralise every colour. Warm shop interiors and coloured neon may be part of the scene’s atmosphere.
RAW or JPEG?
RAW files retain more flexibility for adjusting exposure, white balance, shadows, and highlights. JPEG files are smaller and usually ready to share immediately.
If storage space and editing time are available, RAW is useful for difficult night scenes and high-contrast architecture. If you want a lightweight travel workflow, high-quality JPEG or HEIF may be perfectly adequate.
A practical compromise is RAW+JPEG when storage allows, especially for important photographs.
Composition Techniques That Make Tokyo Photos Stand Out
Tokyo contains so much visual information that composition is often more important than equipment. Without a clear subject, even an expensive camera can produce a confusing image.
Use Leading Lines Tokyo photography Tokyo photography
Road markings, railway platforms, pedestrian paths, bridges, fences, and rows of buildings can guide the viewer’s eye into the frame.
Place the strongest line so that it leads towards your subject rather than out of the image. Avoid standing in unsafe locations to obtain a more dramatic angle.
Apply the Rule of Thirds Selectively Tokyo photography
Imagine dividing your frame into a three-by-three grid. Positioning a subject near one of the grid intersections can create a balanced image, especially when there is meaningful space around the subject.
However, centred compositions are often effective for Tokyo’s symmetrical architecture. The rule of thirds is a useful guide, not a requirement.
Use Layers to Create Depth Tokyo photography
Many Tokyo streets contain foreground objects, pedestrians, signs, buildings, and distant structures. These layers can make a photograph feel more three-dimensional.
Try including a foreground element, a clear middle-ground subject, and a background that adds context. Be careful that signs, poles, and cables do not unintentionally intersect your subject’s head or body.
Frame Subjects Within the Environment Tokyo photography
Doorways, bridges, arches, windows, and tree branches can act as natural frames. They direct attention towards the subject and help organise a busy scene.
The frame should support the main subject rather than become a distraction.
Work With Reflections Tokyo photography
Glass façades, puddles, train windows, shop windows, and water surfaces can create images that combine two scenes in one.
For reflections, move slightly from side to side and observe how the relationship between the reflected scene and the real scene changes. A small shift in position can produce a much stronger composition.
Look for Patterns and Repetition Tokyo photography
Tokyo’s architecture often includes repeating windows, balconies, signs, escalators, and structural lines. Patterns are especially effective when one element breaks the repetition.
For example, a single person walking through a symmetrical corridor may give the viewer a point of focus and a sense of scale.
Photograph the Details, Not Only the Landmarks Tokyo photography
A travel photo series becomes more interesting when it includes close-ups and supporting images.
Instead of photographing only a temple exterior, capture its roof details, a lantern, a path, surrounding trees, and the relationship between the temple and nearby streets. Always respect site-specific rules and sacred spaces.
Street Photography in Tokyo: Etiquette, Privacy, and Safety
Street photography is a way to document everyday life, but it comes with responsibilities. A public location does not automatically mean that every person wants to appear in a photograph.
Japan’s official tourism guidance recommends asking permission when photographing individuals and paying attention to privacy, restricted areas, and local expectations. It also warns against stepping into traffic, trespassing, and obstructing others to get a photograph.
Ask Permission for Identifiable Portraits Tokyo photography
When a photograph focuses on a specific person, make a polite request before shooting. A smile, a gesture towards the camera, and a simple question can communicate your intention even when you do not speak much Japanese.
If the person declines or signals discomfort, respect that response.
For commercial work, organised shoots, or images intended for advertising, additional permissions or releases may be necessary depending on the location and use.
Do Not Photograph People in Sensitive Situations Tokyo photography
Avoid photographing people in private, embarrassing, vulnerable, or otherwise sensitive situations without permission. Be particularly careful around children, workers, customers in small businesses, and people using public transport.
A respectful photograph should not come at the expense of someone else’s dignity.
Respect Shrines and Temples Tokyo photography
Religious sites are places of worship, not simply photographic backgrounds. Some areas prohibit photography, especially near altars or where people are praying.
Meiji Jingu, for example, prohibits photography and video at its main sanctuary where people pray, and restricts promotional photography without permission.
Check signs, follow staff instructions, and put the camera away when requested.
Be Careful Around Railway Stations Tokyo photography
Never step onto tracks, cross barriers, or enter restricted railway property to capture a photograph. Station platforms can be crowded and moving trains may approach quickly.
Keep your equipment close to your body, avoid blocking passenger movement, and do not use a tripod where it creates a hazard.
Understand Venue-Specific Photography Rules Tokyo photography
Rules vary between public streets, commercial premises, museums, gardens, shrines, observation decks, and art installations.
For example, teamLab Borderless permits personal photography under specified conditions but prohibits flash, tripods, selfie sticks and other photographic aids of 30 cm or more, and commercial photography without prior consent. Its rules also prohibit actions that inconvenience other visitors.
This illustrates why you should not assume that a rule from one attraction applies to another.
Avoid Obstructing People for a Photograph Tokyo photography
A good image is not worth blocking a narrow street, stopping a queue, or creating a dangerous situation.
If a location is crowded, wait for a safe opportunity, change your angle, use a different focal length, or return at a quieter time. Patience often produces a better photograph than forcing a shot.
A Practical Tokyo Photography Workflow
A simple routine can help you make better images without spending the entire trip managing equipment.
Before Leaving Your Accommodation Tokyo photography
- Check the weather and sunrise or sunset time.
- Choose two or three nearby photography goals.
- Charge batteries and check memory-card space.
- Clean your lens and pack a cloth.
- Review access rules for any attraction or religious site.
- Carry only the lenses you expect to use.
- Keep your equipment and valuables secure.
When You Arrive at a Location Tokyo photography
Spend the first few minutes observing before taking photographs. Look at the direction of light, where people move, what is reflected in nearby surfaces, and which backgrounds are visually clean.
Take a wide establishing shot, then move closer for details. Change your position before changing lenses whenever it is safe and practical.
During the Shoot Tokyo photography
- Check the edges of the frame for distractions.
- Watch highlights in bright signs and windows.
- Take a few variations in framing.
- Review important images for focus and exposure.
- Avoid photographing only at eye level.
- Keep your camera ready without constantly staring at its screen.
At the End of the Day Tokyo photography
Back up important images to a second location, such as a portable drive or secure cloud service when connectivity allows. Do not rely on a single memory card for the only copy of valuable photographs.
A simple folder system by date and location makes editing much easier later.
Ten Camera and Photography Brands Compared
There is no single best photography brand for every Tokyo visitor. The right choice depends on budget, preferred subjects, lens availability, portability, and whether you already own compatible equipment.
The brands below cover camera systems, lenses, and supporting photographic equipment. They are not directly interchangeable categories, so compare each according to the product you need.
| Brand Tokyo photography | Main strength Tokyo photography | Best suited to Tokyo photography | Considerations Tokyo photography |
|---|---|---|---|
| Sony | Broad mirrorless camera and lens ecosystem | Street, travel, night, and hybrid photo/video work | Model and lens choices can make the system complex |
| Canon | User-friendly camera bodies and broad lens selection | Beginners, portraits, travel, and professional work | Check lens compatibility and system costs |
| Nikon | Ergonomics, image quality, and versatile camera systems | Landscape, architecture, travel, and general photography | Body and lens combinations vary in size and price |
| Fujifilm | Compact camera options and distinctive colour profiles | Street photography, travel, and everyday documentary work | Some models and lenses can be expensive or hard to find |
| OM System | Portable interchangeable-lens systems and stabilisation on selected models | Walking tours, travel, and outdoor photography | Smaller sensors may offer less flexibility at very high ISO than larger formats |
| Panasonic Lumix | Hybrid video and still-photography options | Creators making both photographs and videos | Compare autofocus behaviour and lens compatibility by model |
| Leica | Premium build, optics, and rangefinder-oriented photography | Experienced street photographers and enthusiasts | High purchase and ownership costs |
| Sigma | Lenses and selected camera systems | Photographers seeking particular optical or creative options | Check mount compatibility before purchasing |
| Tamron | Versatile third-party zoom lenses | Travel photographers who want fewer lens changes | Available focal lengths depend on the camera mount |
| Peak Design | Camera bags, straps, and carry accessories | Travellers who need organised, accessible equipment | Accessories improve carrying comfort but do not replace a suitable camera system |
Which Brand Is Best for Beginners?
Sony, Canon, Nikon, Fujifilm, and OM System all offer camera options that may suit beginners, depending on the specific model, budget, and lens package.
Before purchasing, handle the camera if possible. Check whether the controls are comfortable, whether autofocus meets your needs, and how much the full setup weighs.
Which Brand Is Best for Street Photography?
Fujifilm, Sony, Canon, Nikon, and Leica are all worth considering, but the photographer’s technique matters more than the badge on the camera.
A compact camera with responsive controls and a comfortable focal length may be more useful on a long Tokyo walk than a large, heavy system.
Should You Buy New Gear Specifically for Tokyo?
Not necessarily. If your current camera produces good results, invest first in spare batteries, a comfortable strap, suitable storage, and practice with your existing lens.
A new lens is worthwhile when it solves a specific problem—for example, your current lens is too slow for night scenes or too narrow for architectural interiors.
Photography Gear Checklist for a Tokyo Trip
Packing well means preparing for changing weather, long walks, crowded public transport, and different lighting conditions.
Essential Equipment Tokyo photography
- Camera or smartphone.
- One versatile lens or your preferred phone camera.
- One or two spare batteries for a dedicated camera.
- Sufficient memory cards or phone storage.
- A microfibre lens cloth.
- A compact rain cover or suitable weather protection.
- A comfortable camera strap or bag.
- A portable charger for your phone.
- A backup method for important images.
Optional Accessories Tokyo photography
Polarising filter: Can reduce some reflections from glass and water and deepen certain skies, depending on the angle of the light.
Neutral-density filter: Useful for long exposures in bright conditions when you want to blur water or moving elements.
Small tripod: Helpful for permitted long-exposure work, but check restrictions at individual locations.
Telephoto lens: Useful for distant buildings, compressed city layers, and selected subjects you cannot safely approach.
Portable storage: Helpful for backing up photographs during a longer trip.
How to Carry Gear Comfortably Tokyo photography
Tokyo is a city where you may walk several kilometres in a day and transfer between multiple train lines. A comfortable, secure bag is therefore more important than it might seem.
Keep frequently used items accessible, but do not leave your bag open in crowds. Carry only the equipment you need for the day’s plan, and store spare batteries and memory cards in a consistent place.
Tokyo Photography for Different Budgets
A strong photography plan should fit your finances. You do not need to pay for several observation decks, buy multiple lenses, or book a private tour to create compelling images.
Budget Photographer Tokyo photography
A smartphone or an existing entry-level camera is sufficient for many popular scenes.
Prioritise:
- Public streets and accessible outdoor spaces.
- Early visits to popular landmarks.
- Free or low-cost city views where available.
- Walking routes that connect nearby locations.
- Learning basic composition and exposure.
- Backing up your images rather than buying extra accessories.
The Tokyo Metropolitan Government Building observatories are one option for a free elevated city view, subject to opening times and temporary closures.
Mid-Range Photographer Tokyo photography
A lightweight mirrorless camera with a versatile zoom or a compact prime lens can cover most travel photography needs.
Spend your budget on the part of the system that will make the greatest difference. If your photographs are often blurry at night, a faster lens or better handheld technique may help more than a higher-resolution camera.
Professional Tokyo photography
Professional work may require a more specialised setup, but the gear should follow the assignment.
- Architectural work may benefit from a wide lens and perspective-control options.
- Portrait sessions may require lighting, a suitable lens, and location permissions.
- Commercial work may need permits, releases, insurance, and a detailed production plan.
- Editorial projects may require backup bodies, multiple storage options, and a reliable file workflow.
Do not assume that a location permitting casual photographs automatically permits a commercial shoot. Confirm the relevant permissions before arriving with clients, lighting equipment, or a production team.
Common Tokyo Photography Mistakes and How to Fix Them
Even experienced photographers can make avoidable mistakes in a visually busy city.
Mistake 1: Visiting Every Famous Location at the Busiest Time Tokyo photography
Popular locations can become crowded, making it difficult to compose clean photographs.
Solution: Visit early when access allows, return during quieter periods, or change the composition to use the crowd creatively. A photograph showing movement can be stronger than an empty scene that does not reflect the atmosphere.
Mistake 2: Using the Widest Lens for Every Photograph
A wide-angle lens may make a scene feel expansive, but it can also introduce distracting edges and distort proportions.
Solution: Switch to a normal or telephoto focal length for details, layered compositions, and portraits. Step back or reposition yourself where safe rather than assuming a wider lens is always better.
Mistake 3: Overexposing Neon Signs Tokyo photography
Bright signs can become featureless white or saturated blocks if highlights are clipped.
Solution: Review the histogram or highlight warnings when available. Lower exposure compensation or use a suitable manual exposure. Preserve important sign detail, then lift darker areas during editing if necessary.
Mistake 4: Treating Night Photography as a Reason to Use the Slowest Shutter Speed
A very slow shutter speed can create attractive light trails, but it can also blur pedestrians and moving vehicles in ways you did not intend.
Solution: Decide whether you want to freeze motion, show movement, or create light trails. Choose your shutter speed for that intention.
Mistake 5: Carrying Too Much Equipment Tokyo photography
A heavy bag can make it harder to move comfortably and notice spontaneous scenes.
Solution: Build each day’s gear around its main subject. A street-photography walk might need only one camera and one lens, while a planned landscape or architectural session may justify additional equipment.
Mistake 6: Ignoring Privacy and Local Rules Tokyo photography
Photographers can unintentionally inconvenience worshippers, residents, workers, or other visitors.
Solution: Ask permission for identifiable portraits, check signs, avoid restricted areas, and follow staff instructions. Respectful photography is essential when visiting temples, shrines, residential streets, and busy public spaces.
Mistake 7: Editing Every Photograph With the Same Strong Preset Tokyo photography
Heavy contrast, excessive saturation, and extreme sharpening can make Tokyo’s varied environments look artificial.
Solution: Edit according to the scene. Preserve the atmosphere of warm interiors, avoid oversaturating foliage, and keep neon colours believable. Use a consistent style without forcing every image into the same visual treatment.
Mistake 8: Forgetting to Back Up Tokyo photography
A lost phone, damaged memory card, or equipment theft can erase an entire trip’s photographs.
Solution: Back up valuable images daily, ideally to a second location. Keep the backup separate from the device or memory card containing the originals.
Mistake 9: Trying to Photograph Only Iconic Landmarks Tokyo photography
Famous landmarks are useful for establishing where you are, but a gallery of only landmark photographs may lack a personal point of view.
Solution: Build a visual story around details, everyday life, architecture, food, transport, reflections, and changing light. Include a few recognisable landmarks to give the series context.
The Pros and Cons of Tokyo Photography
Tokyo is an excellent photography destination, but understanding its practical challenges helps you plan a better trip.
| Advantages Tokyo photography | Challenges Tokyo photography |
|---|---|
| Wide variety of photographic subjects | Crowds at popular locations |
| Strong contrast between traditional and modern architecture | Complex visual scenes can be difficult to compose |
| Extensive rail network connects many districts | Moving between locations can consume time |
| Night scenes offer distinctive colour and atmosphere | Mixed lighting and low-light exposure are challenging |
| Seasonal changes provide variety throughout the year | Blossom and foliage timing varies |
| Many opportunities for photographers at different skill levels | Venue-specific restrictions require research |
| A smartphone can capture many scenes successfully | Rain, humidity, heat, and battery use affect equipment |
Is Tokyo Suitable for Beginner Photographers?
Yes. Tokyo offers a wide range of subjects that can help beginners practise composition, exposure, timing, and storytelling.
A beginner can start with a smartphone, choose one neighbourhood, and practise photographing the same scene from several angles. This is often more effective than travelling across the city in pursuit of every famous spot.
Is Tokyo Suitable for Professional Photographers?
Tokyo can be rewarding for professionals working in architecture, editorial, street, portrait, fashion, and commercial photography. However, professional assignments may involve location permissions, releases, insurance, equipment logistics, and restrictions that do not apply to ordinary holiday snapshots.
Planning these requirements early is essential.
Future Trends in Tokyo Photography
Photography technology and travel habits continue to change. Several trends are likely to influence how people photograph Tokyo in the coming years.
Smartphone Computational Tokyo photography
Smartphones increasingly combine multiple exposures, image processing, and software-based subject detection to produce usable images in challenging conditions.
This makes them especially practical for travel, where portability and immediate sharing matter. Dedicated cameras still offer important advantages in areas such as lens flexibility, handling, sensor performance, and specialised workflows, depending on the model.
The most useful approach is to choose a device based on the photographs you want to make, rather than assuming that one category is always superior.
AI-Assisted Editing Tokyo photography
AI-powered editing tools can help photographers select images, remove minor distractions, reduce noise, and make targeted adjustments.
These tools can save time, but they should be used thoughtfully. Heavy manipulation may alter documentary meaning, remove important context, or create unrealistic colours and details.
For editorial or documentary photography, follow the standards of the publication or client. Keep originals and disclose significant alterations when appropriate.
More Emphasis on Authentic, Local Stories Tokyo photography
Social media can make famous locations appear visually repetitive. As photographers search for more distinctive work, everyday scenes and neighbourhood details can offer a stronger sense of place.
Instead of attempting to recreate a widely shared photograph, consider documenting a morning market, a changing streetscape, a small local business with permission, or the contrast between a quiet residential lane and a nearby commercial centre.
Authenticity often comes from spending more time observing rather than collecting more locations.
Responsible and Lower-Impact Photography Tokyo photography
Crowding, privacy, and the pressure to obtain a perfect image have become concerns at popular destinations. Responsible photographers plan ahead, respect local rules, and consider the people who live in the places they visit.
More Hybrid Photo and Video Workflows Tokyo photography
Many modern cameras and smartphones support both still photography and video. Travel creators may increasingly combine still images, short clips, audio, and written observations into a single story.
For a Tokyo trip, this could mean pairing a blue-hour skyline photograph with a short clip of the surrounding street, or combining architectural photographs with a written explanation of the location.
The important principle is to make each format serve the story instead of recording everything without a clear purpose.
A Three-Day Tokyo Photography Itinerary
If you have limited time, organise each day around nearby locations and a different photographic style. The itinerary below is a flexible framework; opening times, weather, travel time, and access rules should be checked before you go.
Day 1: Street Life and Night Photography Tokyo photography
Morning: Begin at Meiji Jingu, observing the quiet forest paths and architectural details. Follow the site’s photography restrictions, especially around the main sanctuary.
Afternoon: Move to Shibuya and photograph its urban architecture, pedestrian movement, and surrounding streets. Try both wide scenes and tighter compositions.
Evening: Explore Shinjuku for illuminated signs, reflections, and night scenes. Keep your equipment compact and avoid blocking pedestrians or business entrances.
Day 2: Traditional Architecture and City Design Tokyo photography
Morning: Visit Senso-ji in Asakusa. Photograph the gates, roof details, and neighbourhood atmosphere while respecting religious spaces.
Afternoon: Explore Tokyo Station and the Marunouchi district. Look for symmetry, building lines, glass reflections, and the contrast between historic and contemporary architecture.
Use the time between locations to back up images and check the results from your morning shoot.
Day 3: Panoramas and Waterfront Light Tokyo photography
Afternoon: If the weather and opening conditions are suitable, visit the Tokyo Metropolitan Government Building observatory for a broad city view. Check official information before travelling because closures can occur.
Late afternoon and evening: Head to Odaiba for waterfront views and changing light. Photograph the skyline before sunset, then stay for blue hour if your schedule allows.
This itinerary deliberately avoids cramming too many locations into one day. Leaving time for observation, meals, rest, and unexpected scenes often leads to better photographs.
Tokyo Photography Tips for Different Types of Travellers
The best photography advice depends on what you want to achieve. A family holiday, solo trip, professional assignment, and first visit with a smartphone all require different priorities.
Tokyo Photography for Beginners
Start with one neighbourhood rather than trying to cover the entire city. Practise three skills: keeping the subject clear, using light intentionally, and checking the edges of the frame.
Try a simple exercise: photograph the same street as a wide scene, a medium composition, and a close-up detail. Compare how each image communicates the location.
You can learn a great deal without buying new equipment.
Tokyo Photography for Solo Travellers
Solo photographers have the freedom to change plans when the light or atmosphere becomes interesting.
- Plan a route with nearby locations.
- Use a small bag and lightweight equipment.
- Keep valuables secure in crowded places.
- Use a timer or a small tripod only where permitted.
- Ask another person to take your photograph if you want a portrait.
- Share your itinerary with someone if you plan to explore late.
A solo trip can be particularly productive when you focus on one photographic theme per day.
Tokyo Photography for Families
Family photography is usually about recording shared experiences rather than producing technically perfect images.
Photograph children interacting with their surroundings, family members walking through a garden, and small details that recall the trip later. Keep the pace comfortable and avoid making every stop into a prolonged photo session.
When photographing other families or children, respect their privacy and avoid including identifiable people unnecessarily.
Tokyo Photography for Professional Creators
Professionals should distinguish between casual travel photography and organised or commercial production.
Before a shoot, confirm:
- Location and commercial photography permissions.
- Model or subject releases where appropriate.
- Rules on tripods, lighting, and other equipment.
- Restrictions on filming or recording.
- Insurance and equipment security.
- Delivery requirements and image backups.
A public location is not necessarily available for every type of commercial activity. Confirm the relevant permissions before planning a shoot.
Tokyo Photography for Social Media Creators Tokyo photography
A strong social media portfolio benefits from variety. Combine wide city views, portraits, architectural details, food, seasonal scenes, and short visual stories rather than publishing several nearly identical images.
Shoot with the final format in mind. Vertical images may work well for short-form platforms, while horizontal compositions are useful for travel articles, portfolios, and landscape photographs.
Keep important subjects away from extreme edges if you intend to crop the image into several formats.
Tokyo Photography for People With Limited Mobility Tokyo photography
Photography plans should account for walking distance, stairs, crowd density, seating, and access to public facilities.
Choose a smaller number of locations, check current accessibility information, and allow extra time for transport connections. Observation decks, gardens, museums, and waterfronts may have different access conditions, so verify details directly with each venue.
A single accessible location visited at the right time can provide more opportunities than a demanding route with too many stops.
Editing Tokyo Photographs Without Losing Their Character
Editing should help a photograph communicate what you saw and felt. It should not automatically make every scene more saturated, sharper, or dramatic.
Correct Exposure and Contrast First Tokyo photography
Start with exposure, highlights, shadows, and white balance. Bright neon signs often need careful highlight control, while night streets may contain deep shadows that should remain dark.
Do not lift every shadow simply because the editing software allows it. Darkness can contribute to the mood of a night photograph.
Keep Neon Colours Under Control Tokyo photography
Tokyo’s signs can produce intense reds, blues, greens, and magentas. Increasing saturation across the whole image may make those colours look artificial.
Adjust individual colour ranges if needed, and compare the edited image with the original. The aim is to preserve the atmosphere of the scene, not to make every sign glow unnaturally.
Correct Architectural Perspective Carefully Tokyo photography
Buildings may appear to lean when photographed from below. Perspective correction can help, but extreme adjustments may stretch parts of the image or reduce resolution.
When possible, step back, keep the camera level, and choose a suitable focal length. Software correction is useful, but thoughtful positioning is often better.
Build a Consistent Photo Series Tokyo photography
For a travel blog or portfolio, consistency helps photographs feel like part of the same story.
Consider using similar contrast, colour treatment, and cropping principles across a series. However, allow sunrise, garden scenes, indoor photographs, and neon streets to retain their distinct lighting and atmosphere.
Preserve the Original Files Tokyo photography
Keep original RAW files or high-quality source images when practical. Export edited copies for web use and retain full-resolution files for future printing or alternative crops.
For a website, resize images to the actual display requirements, compress them appropriately, and use modern formats such as WebP where supported. Add descriptive alt text that accurately explains the image for accessibility and search engines.
FAQs
What Are the Best Places for Tokyo Photography?
Shibuya Crossing, Senso-ji Temple, Shinjuku, Meiji Jingu, Tokyo Station, Shinjuku Gyoen, Odaiba, and the Tokyo Metropolitan Government Building observatories are useful starting points. The best choice depends on whether you want street scenes, architecture, nature, traditional culture, or panoramic views.
What Is the Best Time for Photography in Tokyo?
Early morning is useful for quieter streets and traditional architecture. Golden hour offers warm light for buildings and portraits, while blue hour and night are excellent for illuminated cityscapes. Midday can work well for architectural details, indoor scenes, and strong shadows.
Is Tokyo Good for Street Photography?
Yes. Tokyo offers a wide variety of street environments, from busy pedestrian crossings and commercial districts to quiet residential lanes. Photographers should respect privacy, ask permission for identifiable portraits, follow local rules, and avoid obstructing people.
Do I Need a Professional Camera for Tokyo Photography?
No. A smartphone can capture excellent travel images, particularly in daylight. A mirrorless camera or DSLR offers more control and lens flexibility, but technique, light, composition, and timing often make a greater difference than the camera alone.
Which Lens Is Best for Tokyo Street Photography?
A 35mm-equivalent field of view is a versatile starting point for many street photographers. A wider lens can show more of the environment, while a short telephoto lens can isolate details. Choose the field of view that fits your style and working distance.
Is Night Photography Difficult in Tokyo?
It can be challenging because bright signs and dark streets appear in the same frame. Use a suitable shutter speed, manage highlights, and raise ISO when necessary. A fast lens or image stabilisation can help, but neither replaces good exposure decisions.
Can I Use a Tripod in Tokyo?
It depends on the location. Some places permit tripods in certain circumstances, while others restrict them because they can obstruct visitors or create safety problems. Check venue-specific rules before carrying or setting up a tripod.
Can I Photograph Inside Japanese Temples and Shrines?
Photography may be permitted in some outdoor areas and prohibited in others, particularly inside buildings or near sacred spaces. Follow signs and staff instructions. When in doubt, ask before taking a photograph.
When Is Cherry Blossom Photography Best in Tokyo?
Cherry blossom timing varies by year and location. Monitor current seasonal forecasts and local conditions as your trip approaches. Visit early when possible, and consider close-ups, reflections, and smaller compositions if popular locations are crowded.
What Camera Settings Should I Use for Tokyo Night Photography?
For handheld street photography, a starting point might be 1/125–1/250 second with a wide aperture and Auto ISO. For stationary cityscapes with stable support where permitted, a longer exposure and lower ISO may work better. Adjust settings according to subject movement and available light.
Is Tokyo Photography Expensive?
It does not have to be. Many street scenes and outdoor subjects can be photographed without paying for an attraction. Free observation facilities may also be available, subject to their current operating conditions. Budget for transport, admission where applicable, meals, and any specialist equipment you genuinely need.
Conclusion
Tokyo is an outstanding destination for photographers because it combines traditional culture, contemporary architecture, energetic street life, quiet green spaces, and striking night scenes. Its greatest strength is not simply the number of famous landmarks, but the variety of stories that can be found within a relatively connected urban area. You can begin with a smartphone and a short walk, or plan a specialist trip with professional camera equipment. Either way, the most valuable skills are observation, patience, composition, and respect for the places and people you photograph.